A plate of sushi rolls is beautiful … slices of colorful vegetables and a bit of seafood circled by a bed of soft white rice and a dark green seaweed wrapper. Sushi is a feast for the eye as much as it is a culinary feast. It should taste as good as it looks – and it will if you follow a few assembly directions and rolling tips Rolled sushi (“Makizushi” in Japanese) is just one among several varieties of sushi.
Rolled sushi can also be served as a thick log (think cheese log), or “inside-out” where the rice goes on the outside of the seaweed wrapper (called “nori”). Lots of variations and shapes make preparing sushi an artful expression each time. Think of Makizushi as anything that will fit on top of a pile of rice and nori that can then be rolled. So let’s move on so you can start rolling!
The Basics
Rice. Sushi’s base filling is sushi rice, a rice specially prepared for rolling sushi. You can find rice labeled “sushi rice” in the store or use any white short or medium-grain rice. This type of rice is starchier than long-grain and therefore “stickier” (You’ll find out shortly why this is important).
Besides using the right type of rice, adding rice vinegar to your cooked sushi rice will give it the proper texture and cohesiveness needed. You want it to hold together so that you can gather it up in your hands to form a ball.
Find a basic sushi recipe and read carefully. If you follow it, you’ll be cooking the rice until it’s firm – but not too firm – and not mushy. The amount of water you use and how long it cooks will determine its firmness. Let the rice cool off before using.
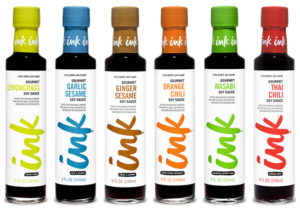
Nori. Nori is seaweed, dried and cut in paper-thin square sheets. It should be in the same section of the store where you buy your rice or Ink Soy Sauce or in a separate international or ethnic food section.
Fillings Galore
Besides the rolling, selecting and cutting the vegetables and fish into pieces that can be lined up lengthwise will make your sushi look beautiful and uniform after rolling and cutting. Experiment with different combinations.
Try avocado or a carrot for color and taste, salmon or crab for a tender meaty taste, and cream cheese for a smooth creamy texture. Use all three and you’ve created one of the more popular sushi varieties known as the Philadelphia Roll.
Fish and seafood used in sushi can be raw or cooked. If you’re using raw, be sure it’s labeled “sushi-grade,” comes from a reliable source, and that you keep it at recommended temperatures before serving.
Other sushi-friendly fillings include cucumber, cabbage, bell pepper, chickpeas, tuna, imitation crab, hard-boiled egg … really, it’s limitless, whether you’re a carnivore, vegetarian, or vegan.
Equipment for Pro Rolling
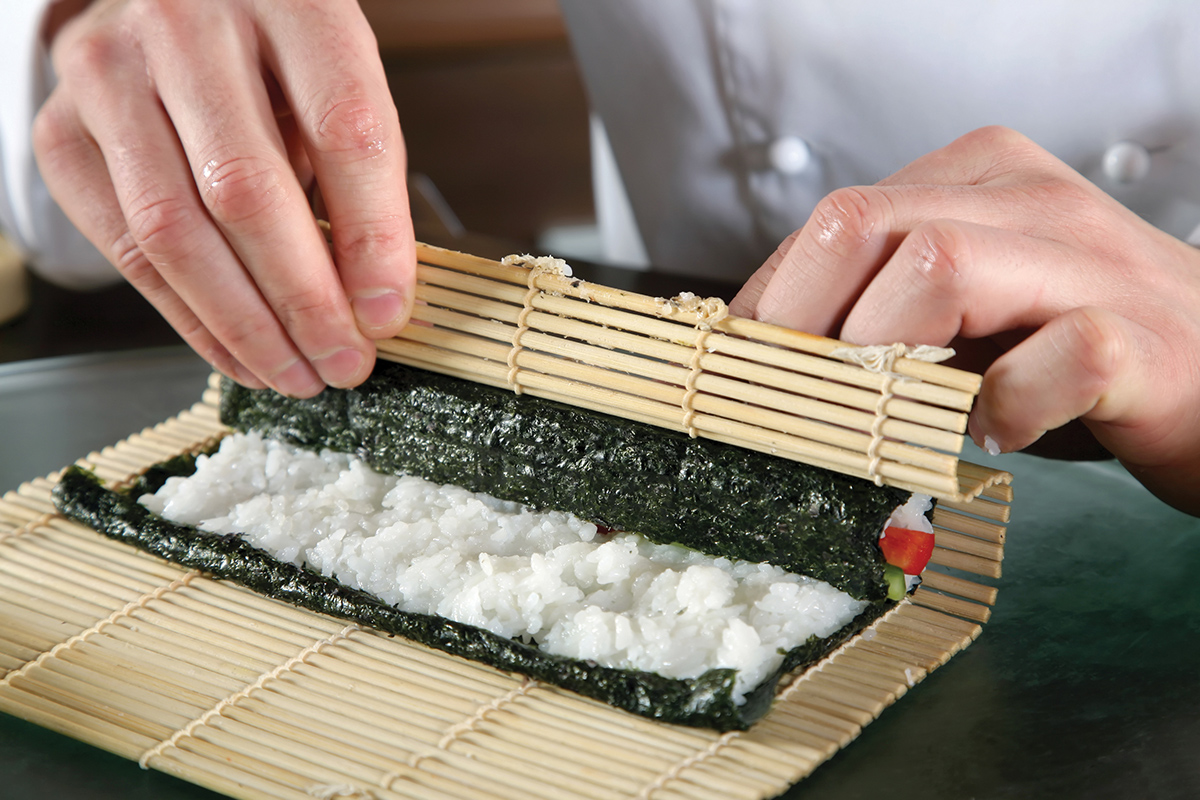
Probably the most important piece of equipment for rolling sushi is the rolling instrument. Traditionally, this is a rolling mat made of bamboo, called “Makisu.” You can’t do this type of sushi justice without this tool. Your mat will help you create a tight, uniform appearance all along your sushi roll and keep you from creating a mess.
A trick some sushi chefs use to keep the seaweed and rice from sticking to the mat is to apply plastic wrap around it. Plastic wrap also makes clean-up quick work; your mat may not even need washing afterward.
A couple other must-haves are a cutting board and a sharp knife. A clean cut on a proper cutting surface will make your job so much easier and quicker. No messing up your beautiful roll with a knife that drags chunks of filling out with it.
Sushi Layering
The order of what goes when is like this … Place a sheet of nori on top of the rolling mat. Grab a handful of room temperature sushi rice (best if freshly made) and lightly apply it on top of the nori sheet, leaving a little space around the edges. Some sushi chefs insist that you be able to see the individual rice kernels and that pressing down too hard when applying the rice adversely affects the taste.
Cut the filling items lengthwise into long sticks or small pieces and add separately onto the rice in an orderly lengthwise fashion. Be sparing in how much filling you use. It doesn’t take much to fill the roll to capacity.
The Art of Rolling
In addition to the traditional bamboo sushi mats, you can find sushi rollers made from plastic curved to help you create a uniform roll. Some people use a simple tea towel. Then there are sushi rolling machines and extrusion tubes can take the place of hand-rolling. But that takes the fun out of making sushi. We’re going to go traditional here with a bamboo rolling mat.
Now for the actual rolling. A misconception is that rolling sushi is one continuous movement, like making a spring roll or egg roll. Nope.
While you’ve got a lot of wiggle room for what goes into a sushi roll, wrapping requires precise movements. Lift the bamboo mat up and over the rice and filling, thumbs behind, fingers on top, pulling tightly as you roll. How you roll will determine the actual shape of the sushi. You can roll so that the sushi is round or you can create a square-shaped sushi where the corners form 90-degree angles. It’s that first roll that determines the shape.
So if you want a square shape, run your fingers across the top and side to flatten it and as you finish that first roll. Once you’ve completed the first roll, adjust the mat and continue rolling in the same fashion while pressing tightly … this is so everything holds together. Typically it takes only two revolutions to complete the roll. Ta-da! You’ve just made a sushi roll.
The Perfect Cut
The next step is cutting the roll into beautiful uniform cross-sections. To help with cutting even pieces, make your first cross-sectional cut in the center of the roll. Then line up the two sections side by side and cut both together, down the middle again. Repeat this action to make as many equal cuts as you wish until you reach the thickness you desire.
Some sushi chefs insist on one stroke of the knife for each sushi cut, others don’t mind creating a quick sawing effect … as long as they have a sharp knife and the cut is clean. If you have to saw away at the roll because your knife didn’t pierce the nori or the filling, you’ve destroyed the integrity of the sushi. Say no to ugly sushi! It’s also good form to wipe the knife after each cut.
Plating Sushi
Sushi is special not only because of the beauty of the colorful cross-sectioned slices but also the arrangement on the plate. For thin-cut sushi, a nice presentation is to arrange in a circular pattern on the plate. A pretty arrangement for square-shaped sushi is to line up the pieces in a square formation like individual square cells forming one big square.
The Sauce That Replaces the Garnishes
Now you’re ready for the finishing touch. Pickled ginger and a dab of wasabi are traditional sushi condiments. But, Ink Soy Sauce eliminates the need to buy these pricey additions. Instead, grab a bottle of Ink Wasabi Soy Sauce and Ink Ginger Sesame Soy Sauce to enjoy these flavors right out of the bottle. For a little extra heat, try Ink Thai Chili Soy Sauce. We suggest serving Ink Soy Sauce in small individual bowls. Let your family or dinner guests pour, dunk, and enjoy!